Learn how to make beeswax candles with just a few supplies to help your home feel cozy and inviting. As a bonus, they help to purify the air too!
The homemaker’s special touch
I love finding little ways to make a space more beautiful. Spaces that come together with more time and physical effort than financial investment are some of my favorite spaces. That’s what beeswax candles are for me. Whether they be taper candles on the dinner table or vessel candles lighting the way for completing the dinner dishes, they really elevate the entire space (and my joy). There’s something so soothing about the warm flicker of a candle once the children are in bed. Although, they too ask to light them daily and fully appreciate their beauty.
What’s so special about beeswax candles
The golden glow and long burn time are just the beginning of a beeswax candle’s charm. About a decade ago, I started to seek out more natural alternatives to some of my favorite products, candles being one of them. Growing up, my mom always had candles burning so it was a sense of home for me to have a candle flickering. My husband and I even made our own candle wedding favors.
Paraffin candles are known to release carcinogens in the air when burned so I knew I wanted to find a different way. Beeswax candles, on the other hand, burn clean and release a slight honey scent.
Tips for making beeswax candles
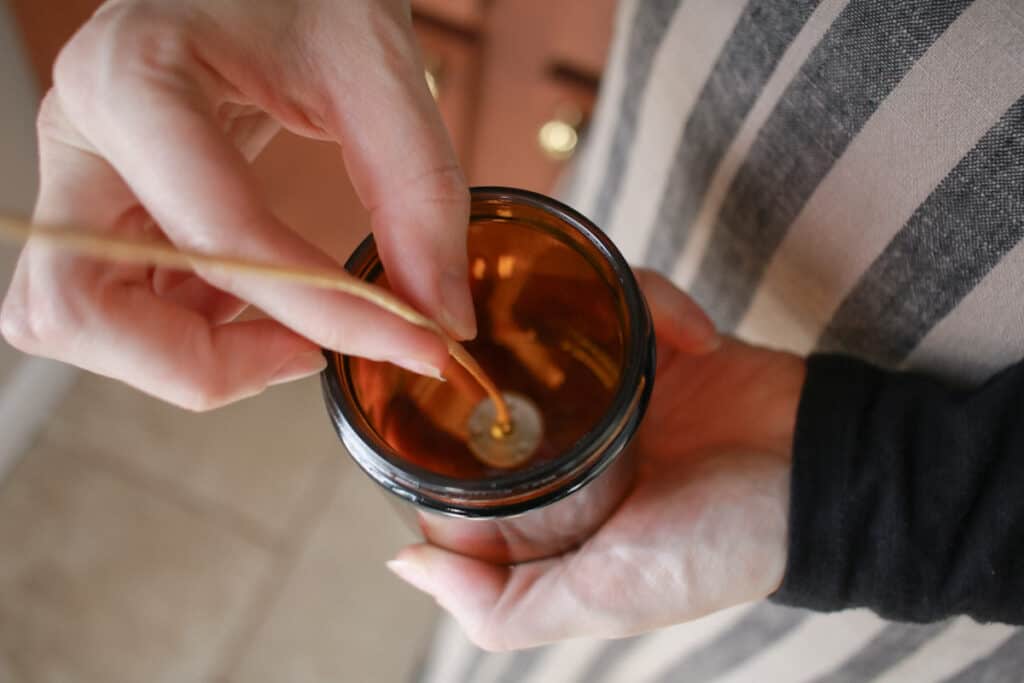
- Secure the wicks with hot glue or wick stickers and be sure they are centered. Slipping the wick throught the hinge of a clothespin is by far my favorite way to center the wicks.
- Regardless of if you decide to add essential oils or not, do not expect them to smell as strong as conventional fragrance-filled candles. However, do experiment with different essential oil scents.
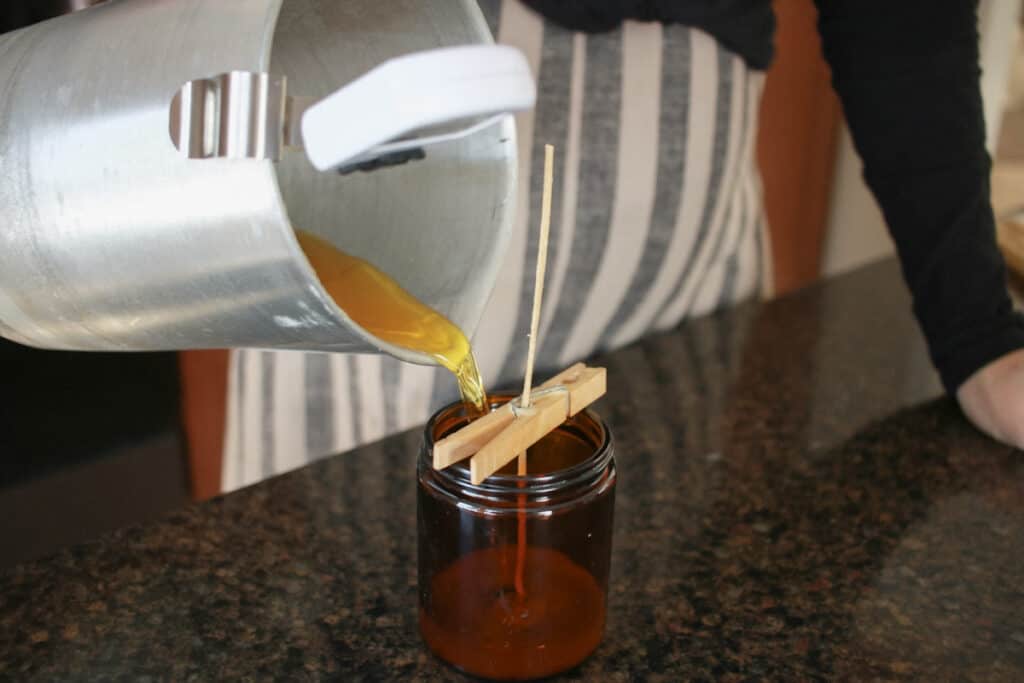
- Cool the wax to 155-160 degrees before pouring into your prepared jars. The wax cools quickly but I find that this pour temperature helps to prevent cracking in the top as they harden.
- Pour them in a place you can leave them sit without being disturbed for the first few hours at minimum, but ideally for the first 24-48 hours.
- Pour quickly and evenly. Do not stop mid-pour or you will be able to see the uneven pour as it hardens.
- Many recipes call for an add-in oil such as shea butter or coconut oil. I have not enjoyed the cracks and uneven burn that those recipes seem to have in common.
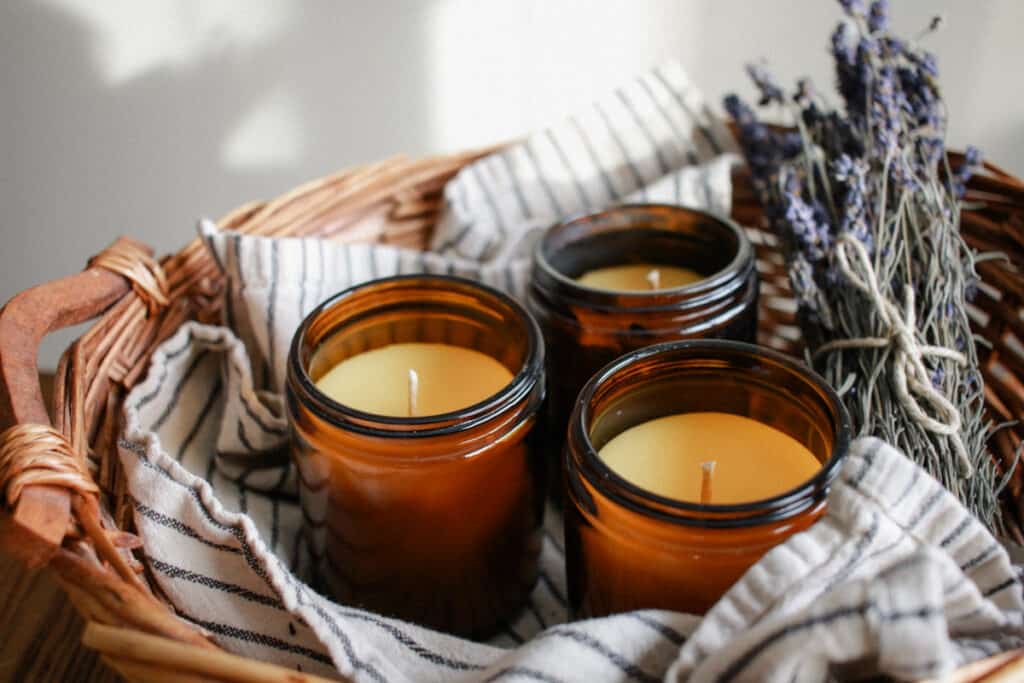
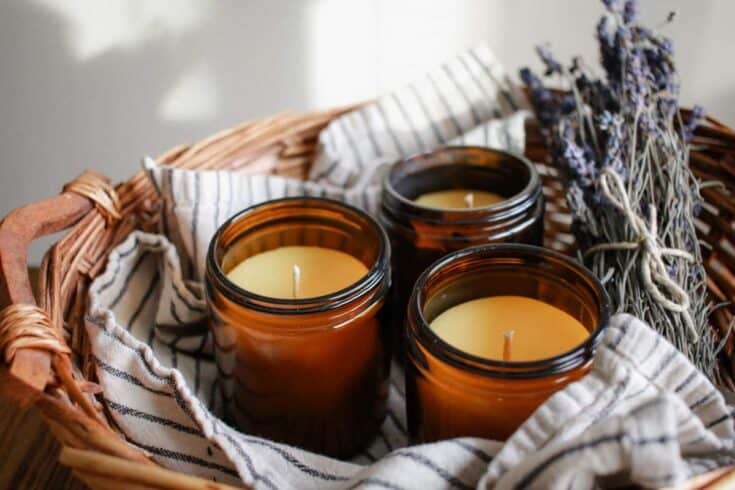
- Choose a vessel like this or one similar in width. A pint or 1/2 pint ball jar would be great too! I’ve found this size gets the most even burn to the edges without getting too hot. Outside of the size, have fun with your jar choice! Thrift a cute tea cup or similar sized vessel!
- Don’t overthink it! Making beeswax candles is truly oh so simple!
Helpful supplies to have on hand
- Beeswax pellets: I’ve ordered this in the past and also ordered at Bulk Apothecary in major bulk if you are looking for a bulk option.
- Candle wicks: These are the pre-tabbed one’s I have on hand. Keep in mind that beeswax candles burn much slower than other candles so they need this thicker wick.
- Wick stickers and clothespins: These help the wicks stay in place in the center of the jar which is crucial for an even burn.
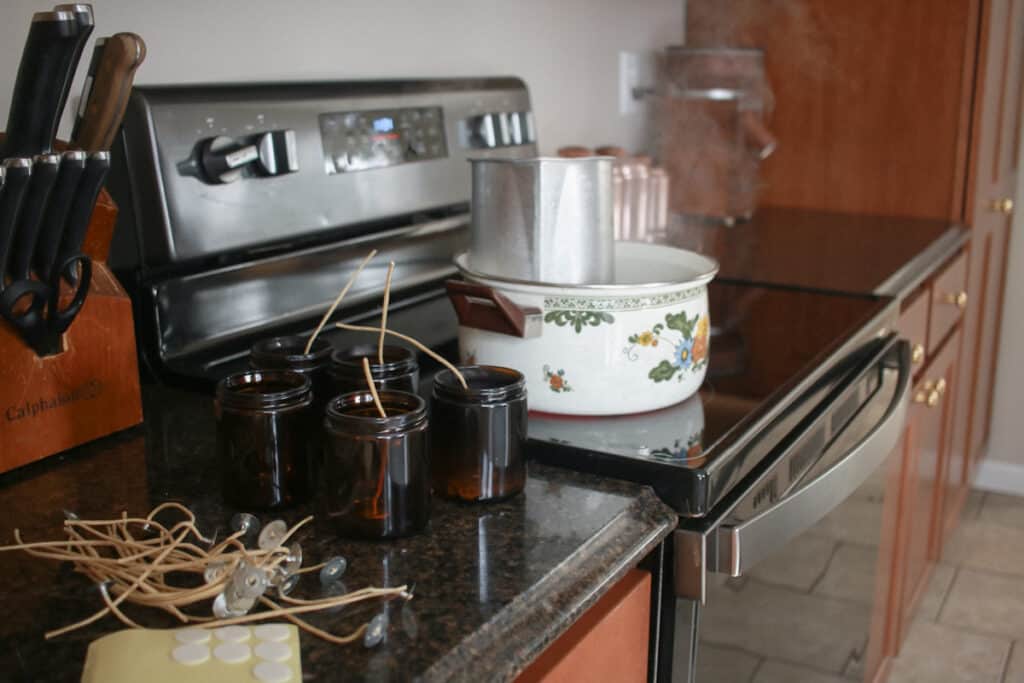
- Candle making pouring pot: This is not completley necessary. You can create a double boiler effect with a pot (I thrifted my floral one especially for candles) and a glass bowl. But I much prefer having designated candle making supplies that I’m not cooking out of leftover candle wax residue.
- Thermometer: This is by far my favorite one because of the long probe and ease of clipping it to the double boiler.
- My favorite jar for even burning and a single wick.
Step-by-step: How to make beeswax candles
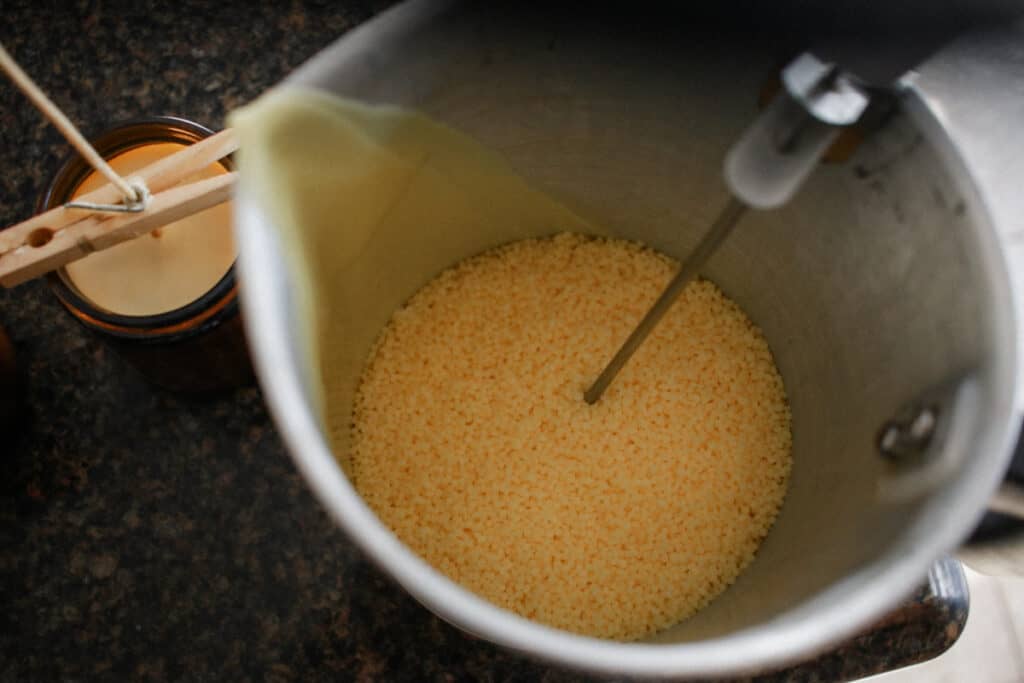
- Add 1 pound of beeswax pellets to your double boiler setup of choice on medium heat. For me this looks like adding a couple of inches of water to my floral pot and then placing the candle melting pot in the water.
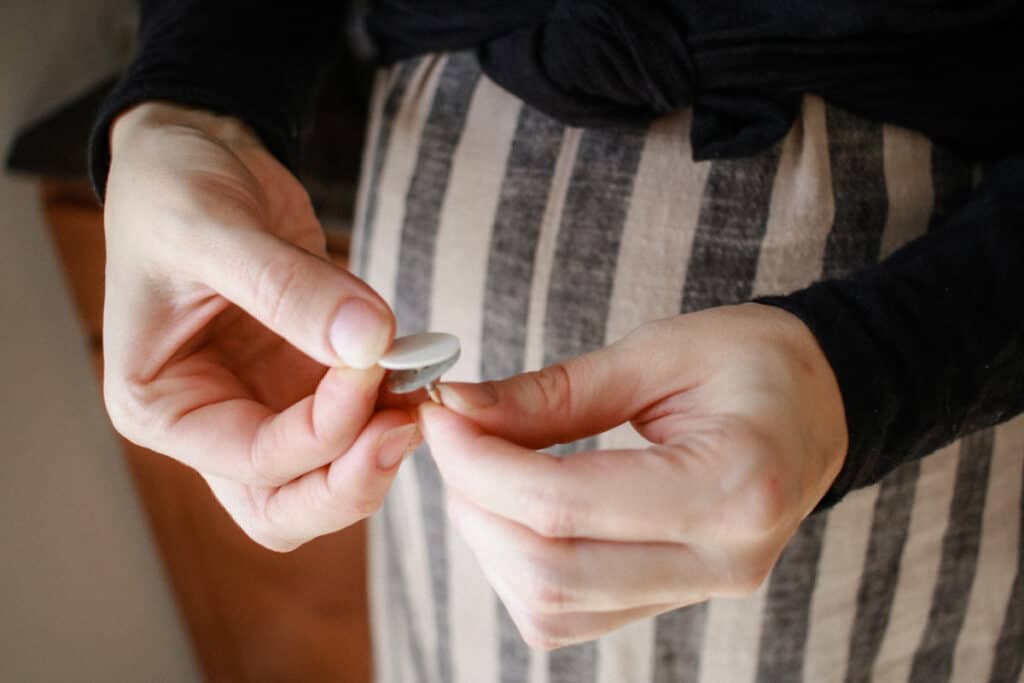
2.. Pull one of the wick stickers off of the sheet and apply to the end of the wick tab. Then peel off the other paper to expose the opposite sticky side
3: Attach the wick to the bottom center of the jar, assuring that you press down fully on the wick tab.
4: Slip the clothespin over the wick to and position the wick to center.

5: Once the beeswax is melted completely, remove from the heat. If the wax is above 160 degrees, continuously monitor until cooled to 155-160 degrees. Add essential oils at 160 degrees and stir.
6: As soon as the essential oils are combined well, pour the wax evently into the prepared jars without pausing.
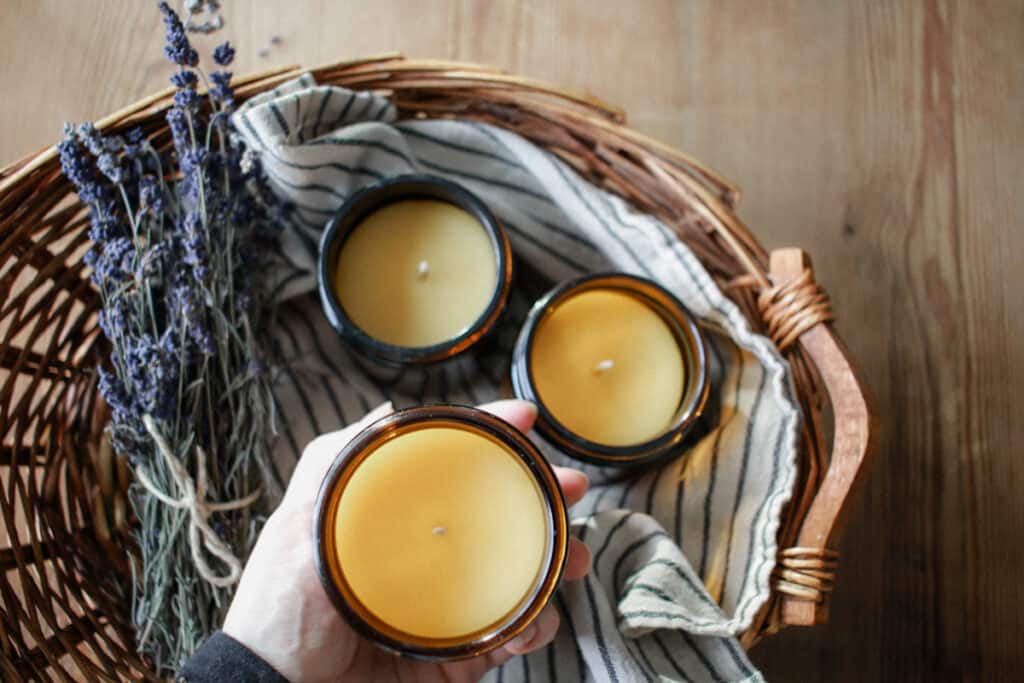
7: Allow to cool undisturbed for (at minimum) a few hours but preferable 24-48 to properly cure.
Using your beeswax candles
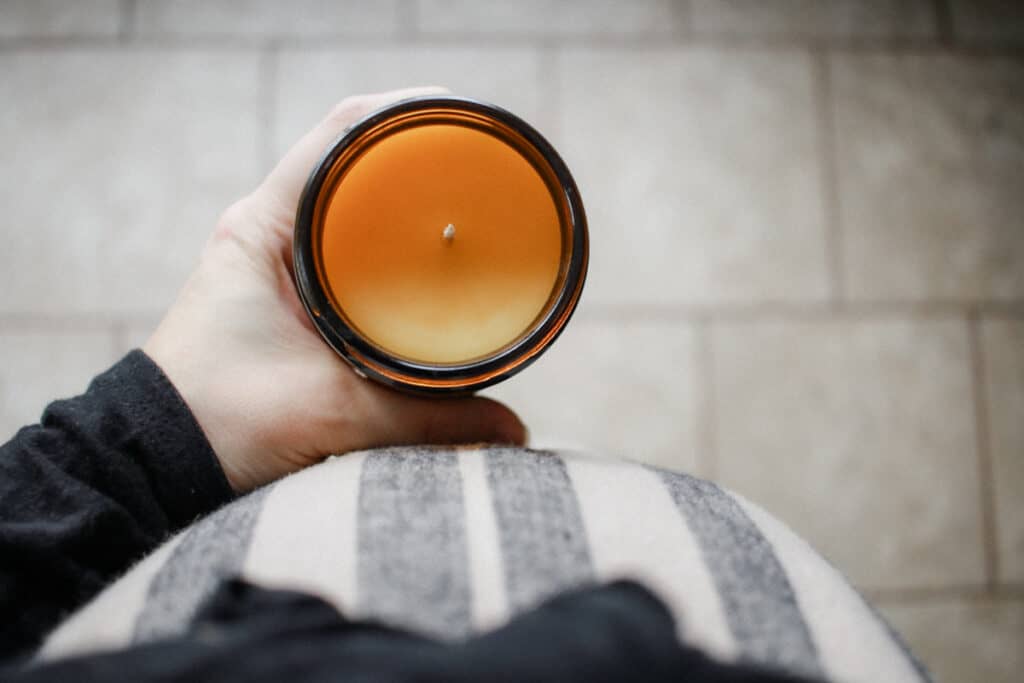
Once your candles have cured for 48 hours, trim the wick to about 1/4 inch.
Allow the candle to burn long enough so that it reaches the edge of the jar at each burn to prevent tunneling.
If you prefer a beeswax taper candle over a vessel, see the step by step guide below:
How to Make Beeswax Taper Candles
Remember, dear homemaker, be the light in your home today <3

How to Make Beeswax Candles in a Vessel
Learn how to make beeswax candles with just a few supplies to help your home feel cozy and inviting. As a bonus, they help to purify the air too!
Ingredients
- 1 pound of beeswax pellets
- Other supplies: wicks, wick stickers, jars, clothespins, double boiler, thermometer
Instructions
- Add 1 pound of beeswax pellets to your double boiler setup of choice on medium heat.
- Pull one of the wick stickers off of the sheet and apply to the end of the wick tab. Then peel off the other paper to expose the opposite sticky side.
- Attach the wick to the bottom center of the jar, assuring that you press down fully on the wick tab.
- Slip the clothespin over the wick to and position the wick to center.
- Once the beeswax is melted completely, remove from the heat. If the wax is above 160 degrees, continuously monitor until cooled to 155-160 degrees. Add essential oils at 160 degrees and stir.
- As soon as the essential oils are combined well, pour the wax evently into the prepared jars without pausing.
- Allow to cool undisturbed for (at minimum) a few hours but preferable 24-48 to properly cure.
Notes
- Once your candles have cured for 48 hours, trim the wick to about 1/4 inch.
- Allow the candle to burn long enough so that it reaches the edge of the jar at each burn to prevent tunneling.
This is wonderful! And such beautiful photography to help explain!
Thank you! I’m so glad you enjoyed it!